How to Reverse a Video in CapCut App
Whether you want to make a video that gets you many views or create a cool video for your social media, using the right editing effects is highly important. Effects, filters, transitions, cuts, and other things can significantly improve your storytelling.
In fact, even simple effects like reversing a video can change your final video drastically. You can easily reverse the whole video or just a part of it using tools like CapCut, which helps you take your video to the next level. And so, we are here with a complete guide on how to reverse a video in CapCut.
What is CapCut?
Suppose you are new to video editing and are still learning everything related to making videos. In that case, you should know about CapCut, one of the best video editing tools out there. Anyone can use it because it is available for both mobiles and PCs. Despite being a mobile video editor, CapCut Mod APK offers everything you need for creating social media videos because TikTok itself owns it. Some of the key features it includes are:
- An extensive library of easy-to-use editing templates for faster editing.
- Supports AI filters and editing tools for excellent results.
- Easily discover and use the latest video trends and editing effects.
- Remove backgrounds in your videos with or without a green screen.
- Apply animated captions, use multiple layers, add stickers, and more.
Why Reverse a Video?
While the reverse video effect is pretty self-explanatory, it is definitely possible that you may not know when and how to reverse a video in CapCut. You must use all video effects in the right place when editing videos. This ensures that your edits are seamless and the overall video lets you better tell a story.
Now, coming to the reverse video effect, you can do it for the whole video or a specific part. For example, if you want to show a replay of a key moment in your video, you can use the reverse effect to go back in time and then add a replay. But if you are trying to create something dramatic or funny, you can reverse the whole video.
How to Reverse a Video in CapCut?
Now that you know when to reverse a video and the benefits you can get out of it, you may want to go ahead and try it out. Thankfully, since CapCut offers an easy-to-use design and layout, applying effects like reverse video is relatively easy. You can easily learn the whole process using this step-by-step guide:
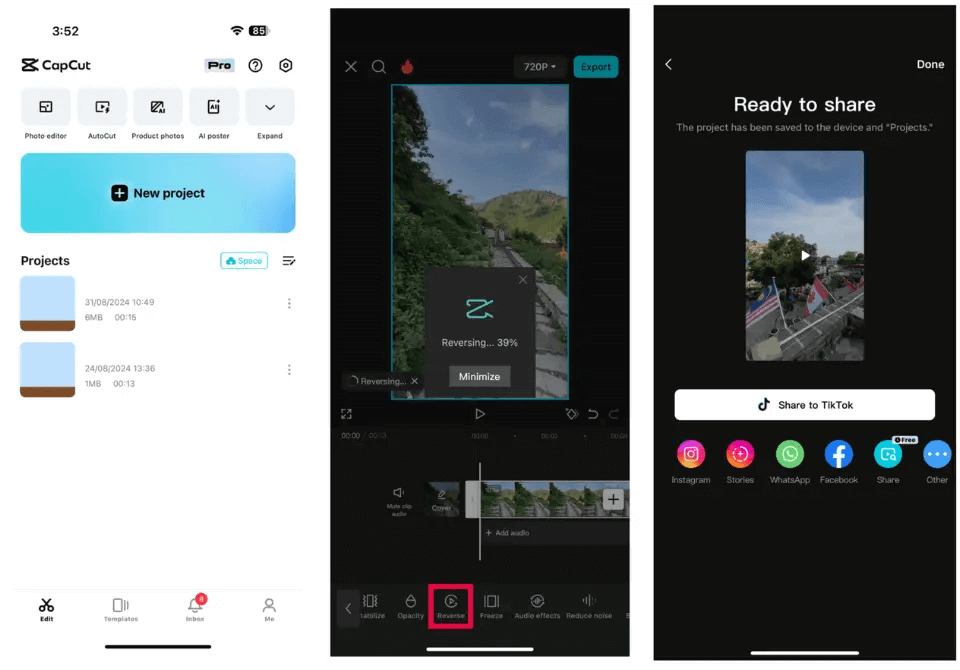
Step 1: To start, open CapCut and tap on New Project.
Step 2: Select the videos from the gallery you want to reverse.
Step 3: Once on the timeline screen, choose your video and go to the editing options.
Step 4: You must scroll right and select the Reverse effect.
Step 5: Your video will be reversed after CapCut processes this effect.
Step 6: You can tap the Export button in the upper-right corner after selecting your desired resolution.
Step 7: Once the reverse video is exported, you can share it with any app you like.
Conclusion
The reverse feature is an excellent addition while creating incredible and magical videos. Going through the guide above, you must know precisely when and how to reverse a video in CapCut. But if you still have any questions, feel free to drop those in the comments section.